Mr. March Mistler Art + Design
  • Blog
  • Web Design
  • Dig Pub
  • Fashion
  • Photo
  • Graphic Design
  • Fashion 2
  • Student Gallery
  • About

Web Design

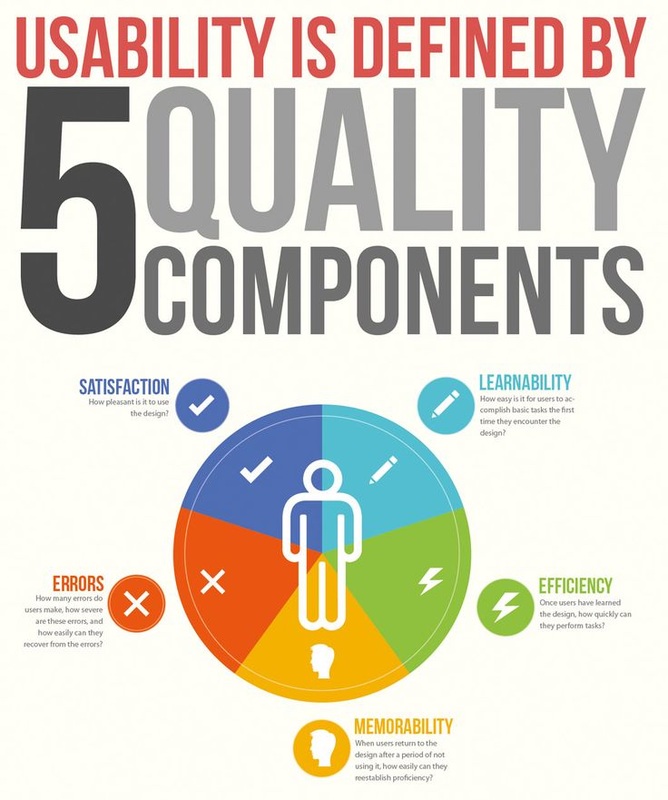
Web Design is a full year class open to all students. Students learn about the fundamentals of web design coding and layout while researching and applying the usability principles.
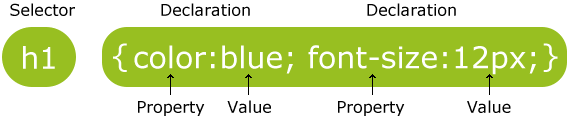
Course Expectations

HTML Practice 4 (with Javascript)

3/20/2019

8 Comments

 
Picture
1) In the head...
Title the page "Music"
Set the author
Set the viewport
Define 5 keywords in regards to this site
Give the site a description for search engines
<meta name="description" content="This is the text that will show up on search engines. It is important to write 2-5 sentences. It should be under 160 characters because Google truncates text longer than that.">

2) In the body....
Headline: [Your Name]'s Musical Taste
Subheadline: Write the name of your favorite musical genre (ie Country Music)

3)Write 1 paragraph describing your musical taste and EMBED a YouTube video that you like. Go to the video, click "Share," then "embed," and copy and paste that code
Insert an unordered list with your top 5 favorite bands/artists
Insert 1 image of your one of those bands/artists

4)Using CSS, change the style for h1, h2, paragraph, and body to your personal taste! Give the body a margin of 25px. 

5) Insert Javascript code so that a button comes up underneath your image that says "Do you know this band/artist?". When it is clicked, that button reveals the name of the artist/band. Remember, that we are putting the Javascript in the body. Write an html comment describing what this code does <!--Remember this is a comment tag-->.

<p id="demo">My favorite band/artist</p>

<button type="button" onclick="myFunction()">What is my favorite book?</button>

<script>
function myFunction() {
  document.getElementById("demo").innerHTML = "Answer to your favorite band/artist";
}
</script>


8 Comments

Final Artist Portfolio

6/5/2017

0 Comments

 
Picture
Your final project is to create a portfolio website showcasing your work from this course. Every artist should also be a business person. Having marketable skills is only helpful if you market yourself! You may create this site using Wix.com. Take a look at working artist sites for examples. Check out the site by a former student. It is your responsibility to learn a new GUI and teach yourself how to use WIX. Try not to ask me questions unless you get really stuck. This site is your final project and should reflect the skills we have learned in class. 

Your site should include the following:
  • Homepage: personally designed logo and anything else you may want to put on the homepage. The homepage could ALSO be the portfolio page.
  • Portfolio: include at least 9 pieces of your design work from the course. 
    Assignments include: Caricature Self-Portrait, Restaurant logo, Restaurant site, App design, kaleidoscope artwork, social media midyear, screenshot of your html site, god/goddess, snapchat geofilter, animated gif. Be sure to caption all of your artworks; do not leave the filenames as the captions.
    Your artwork should begin and end with your strongest pieces. The weaker pieces should go in the middle or be left out. ***Make sure that you've used artboards on all of your files so there is no extra white.
  • About: Write about yourself and artist statement (see below) (maybe a photo)
  • Contact: Place a contact form and be sure the contact form links to a personal email address. 

Steps:
  1. Create your logo in Illustrator or Photoshop and export as a transparent PNG
  2. Compile all of your artwork
  3. Design your site in Wix.com
  4. Upload your artwork and add captions
  5. Write your artist/about statement
  6. Have Mr. March Mistler edit the statement
  7. Check over your entire site. Make sure you have no empty templates! 
  8. Input your URL into Google Classroom as a link

How to write an artist statement:
  • An artist statement should describe the following: WHY YOU MAKE YOUR ART, WHAT INSPIRES YOU TO MAKE IT, WHAT IT SIGNIFIES OR REPRESENTS, WHAT'S UNIQUE OR SPECIAL ABOUT HOW YOU MAKE IT, and briefly, WHAT IT MEANS TO YOU. Answer those questions.

Topics we have learned in class:
  • Good layout
  • Hierarchy
  • Utilization of 3-Dimensionality
  • Alignment
  • Typography
  • Color Theory
  • Elements of Art and Principles of Design
  • User Experience (UX)
  • HTML

Grading Criteria
Check out the rubric her

0 Comments

Animated Gifs & Email Blasts

5/25/2017

0 Comments

 
Picture
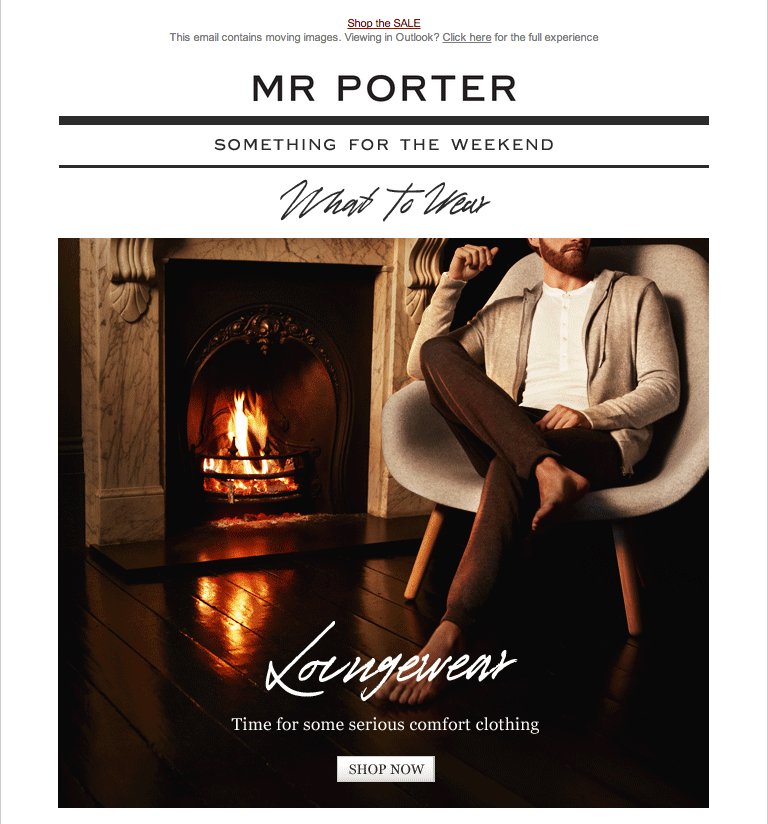
Background
An animated gif is essentially a file that rotates through multiple frames in order to create the illusion of movement. They are often used for advertisements (see image above) but they can also be used to make artwork. Your assignment is to create a targeted email campaign that includes both text and moving imagery. The email blast should aim to advertise a product or service in a creative way using ONLY your imagery. You may not use stock imagery for this. 

Steps to create an animated gif:
  1. Read through these artists' tips on making animated gifs
  2. Sketch out your idea on a storyboard
  3. Draw the vector images that you need in AI
  4. To duplicate your artboard, click the artboard tool (shift+o) and then while holding option, drag the artboard over to the right. Repeat for as many frames as you need. Draw the frames.
  5. Export the files as .pngs. Make sure you click "use artboards".
  6. Set up your file in Photoshop (8"x8" and 72 ppi).
  7. Record using the animation window (click Window>Timeline).
  8. Click on the bottom left hand corner to change the view to frames.
  9. Change the duration to .2 seconds or whatever you want.
  10. Change "once" to "forever" so the gif loops.
  11. Import each image in a separate layer/frame (this is very important to remember).
  12. Show a layer for each frame, much like a flip book.
  13. Save for web. Save as a gif with 256 colors. Test it before you turn it in.

Check out this artist and this one who creates such great animated GIFs. Also, this site has some great examples of animated gifs in email marketing. Do you think that animated gifs are fine art, well now they are being given their time in museums!

Grading Criteria
  • Creativity
  • Uniqueness
  • Quality of imagery
  • Technical Quality (correct image type/size)
Picture
Artist Daisuke Nimura
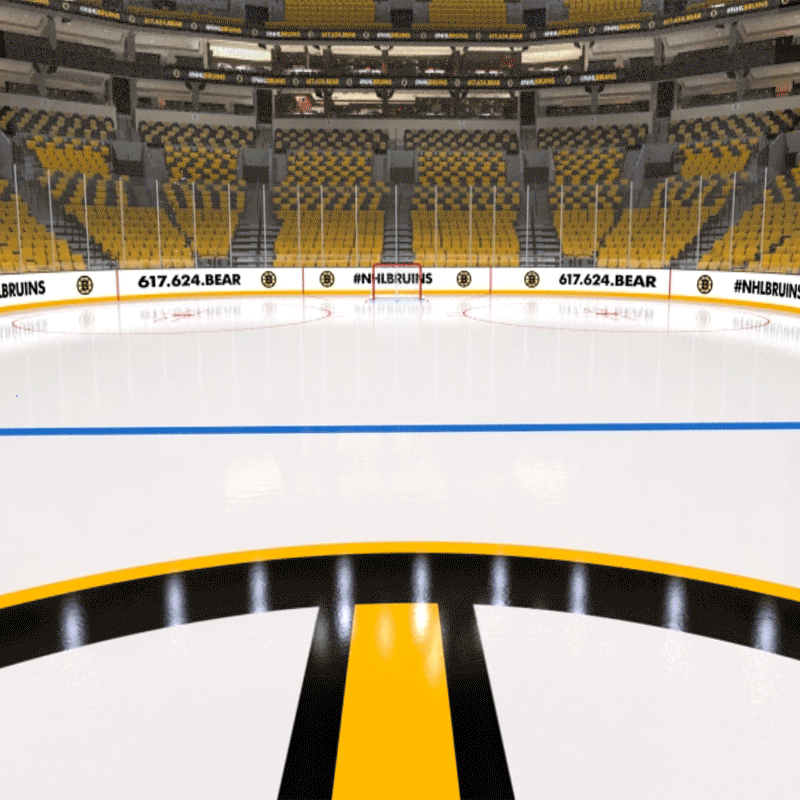
Picture
Student design
0 Comments

Setting Up Your Blog

9/11/2016

0 Comments

 
Picture
Project Description:
Blogging has not been around for long since the history of the Internet is relatively new in terms of world history. This project will allow you to set up your own blog and continually maintain it throughout the first semester of the year. You will learn how to design your blog, how to update it, how to research posts, and how to add different types of content. Remember, your blog is not just for you; it needs to be able to add something to other people's lives. You want to create a successful blog. The blog will be updated for terms 1-3.

Assignment:
Your assignment is to create a blog using weebly. You will write about art, web design, your lives, popular culture, and many times will have time to write free posts. 

Tips:
  • Do NOT include your last name or location
  • Do not leave any blank pages or blank templates
  • Pages: Blog, Artwork (blog page), About, Contact
  • It's important to think about Cyber Security and Safety, so be sure NOT to give any personal clues or information about yourselves. This especially includes location and last name (I have repeated this because it is important!)

How to Make Your Blog Fantastic: 
  • Keep it organized 
  • Update it daily
  • Allow users to comment (and respond)
  • Incorporate relevant and new content
  • Include lots of visual content (photos/images/videos)
  • Needs to have a visual theme throughout

How you will be graded each term:
  • Number of Blog Posts 
    Do I have the correct number of blog posts?
  • Blog Content (images, media, text, etc)
    Are my posts thought provoking? Are they worth reading? Are they at least 1 paragraph? Do I have complete thoughts? Have I done research when needed? ie reading other blogs, doing Google searches, etc. Have I cited my sources on each post?
  • Blog Design
    Does my blog stand out by using the elements & principles? Am I utilizing good design to create a dynamic blog? Do I have any unfinished pages or content? 
  • Spelling & Grammar

Resources:
5 Ways to Find your Blogging Personality
How to Write an Awesome Blog Post
Top 10 Bloggers


Exemplars:
  • http://thisiscolossal.com
  • ​http://simplyrecipes.com
  • http://gizmodo.com
  • http://studentsforafreetibet.com

0 Comments

Last Project Before the Final

5/26/2016

0 Comments


Option 1: Book Cover

  • Draw a sketch first
  • Create in AI
  • Size: 8"x10"
  • Recreate a famous book cover
  • Include the book title & author
Picture
Aysha Afzal

Option 2: Album Artwork

Picture
  • Draw a sketch first
  • Create in PSD
  • Size: 8"x8"
  • Create an album cover for iTunes
  • Include the artist and album/song name

0 Comments

Usability: Designing for Human Interaction

5/5/2016

0 Comments

 
Picture
Picture
Think of UX design like this plug. It's so easy to use and it will make your life so much simpler.
Picture
"Don't Make Me Think!"

Human centered design is a term you may have heard before; it refers to creating websites, games, and other digital interfaces that take the user into account.

UX Design: the User Experience designer is in charge of how the content flows from one thing to the next.
  • Below is an actual Twitter job description for a UX designer: 
    Define interaction models, user task flows, and UI specifications. Communicate scenarios, end-to-end experiences, interaction models, and screen designs to stakeholders. Work with our creative director and visual designers to incorporate the visual identity of Twitter into features. Develop and maintain design wireframes, mockups, and specifications as needed.

UI Design: the User Interface designer is responsible for taking what the UX designer does and makes it visually work. The UI designer's job is very important. 
  • Actual job description for a UI designer from airbnb.com
    Concept and implement the visual language of Airbnb.com. Create and advance site-wide style guides.

Assignment:
  1. Find one GOOD use of UX design on your iPad, screenshot it, and write at least 5 observations as to how it is easy to use. 
  2. Find one bad use of UX design on your iPad, screenshot it, and write at least 5 ways of how it can be fixed.
  3. Pass it into Google Classroom. 

Resources:
Fastcodesign
Bad UX Design Tumblr
Picture
0 Comments

Designing an iPad App

5/2/2016

1 Comment

 
Picture
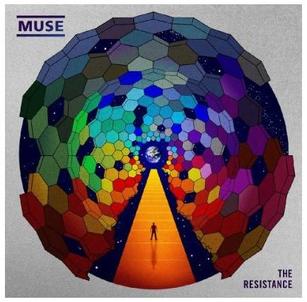
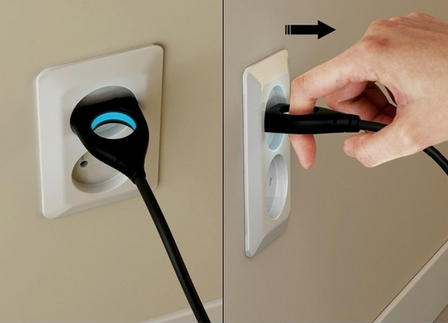
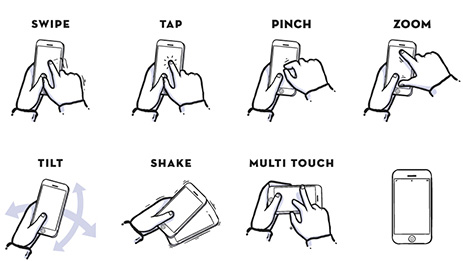
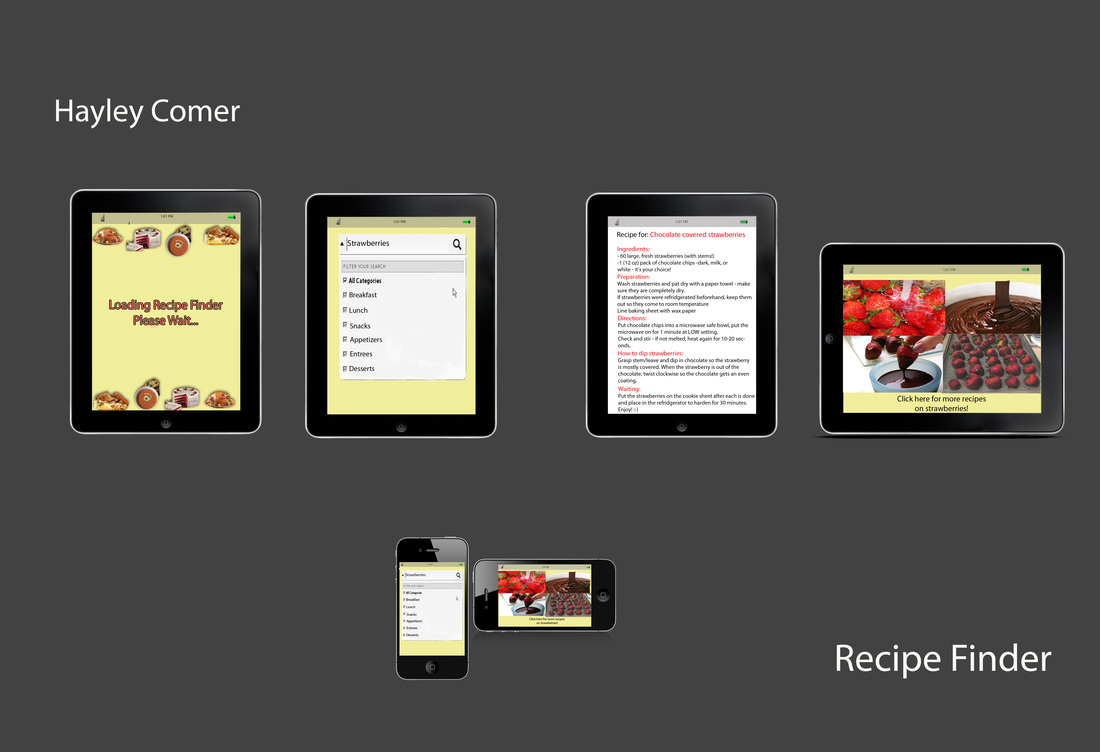
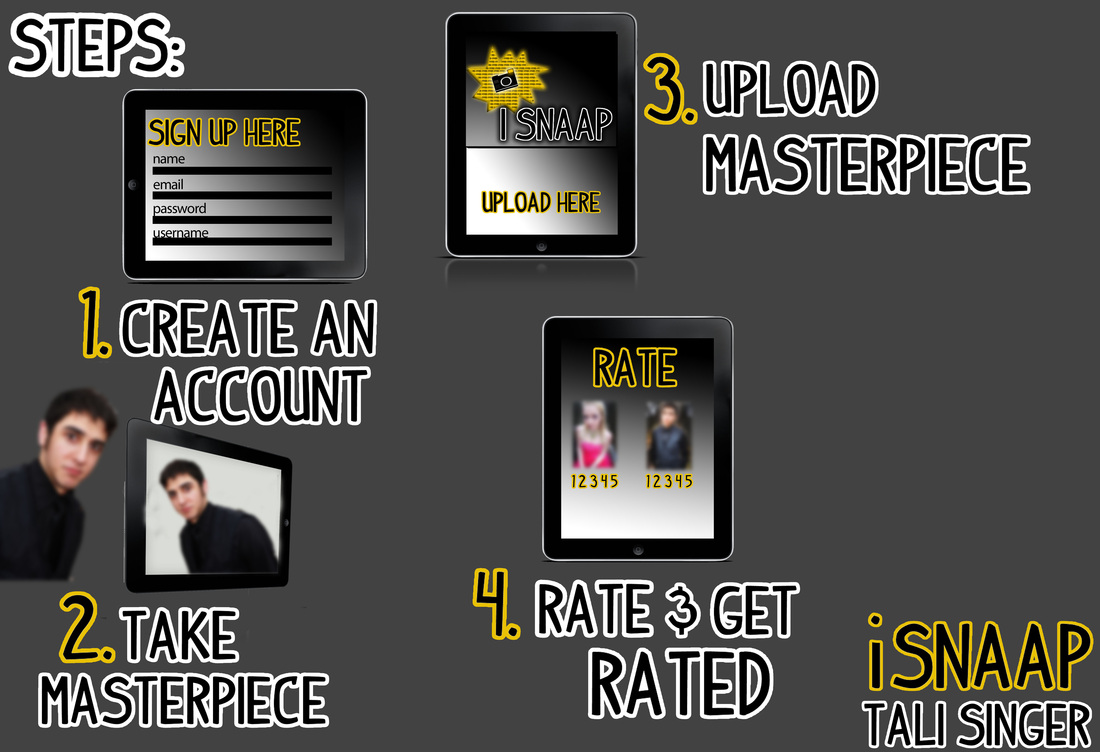
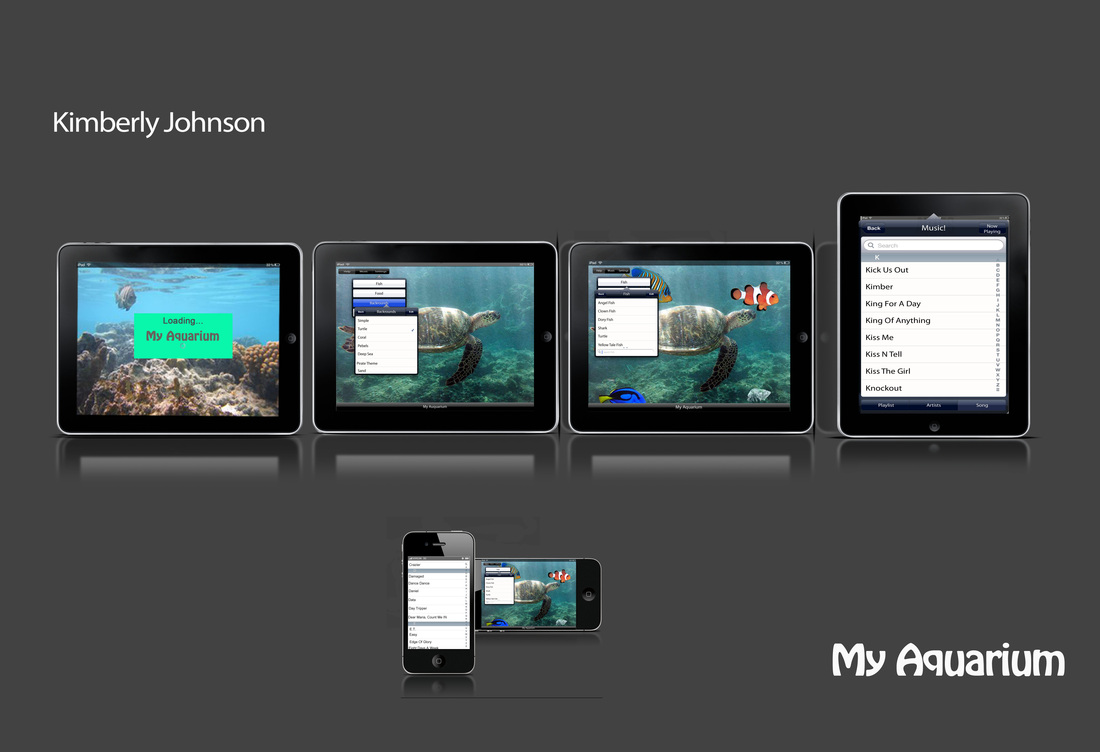
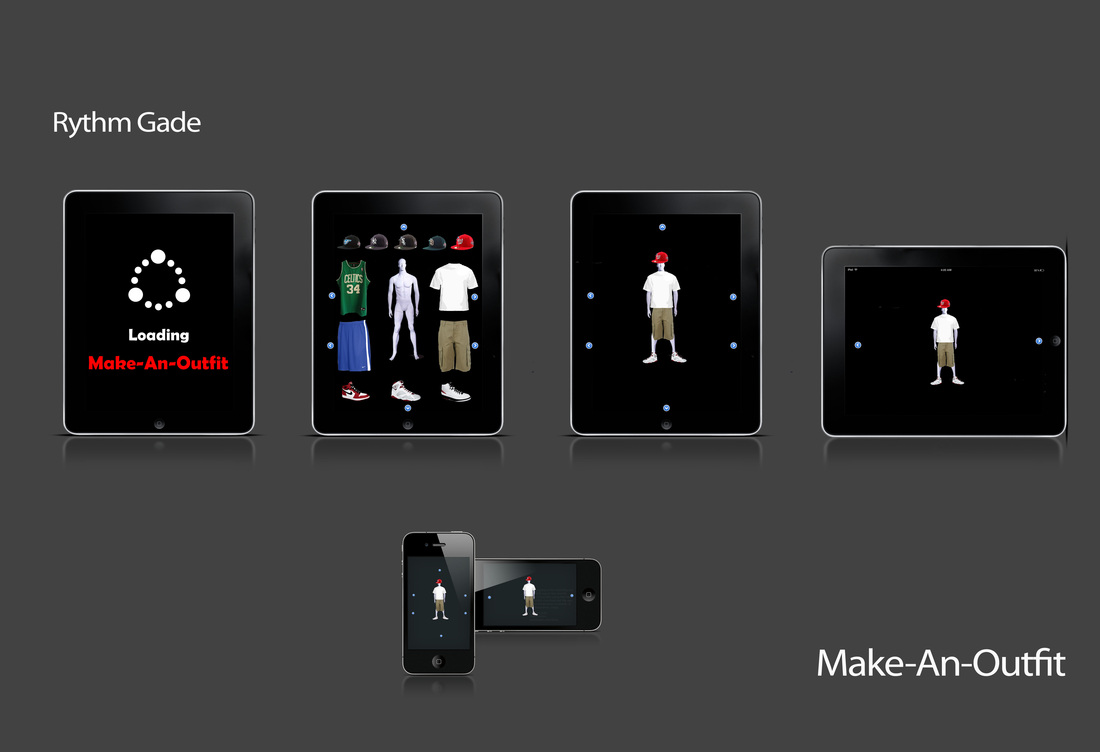
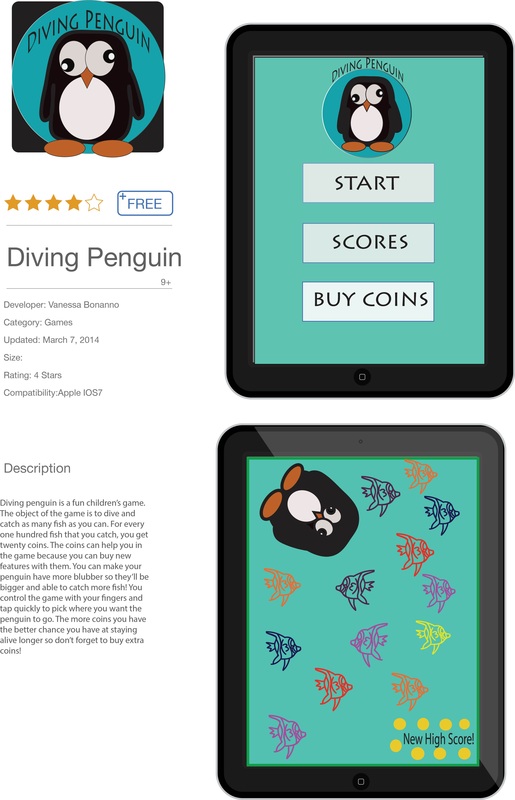
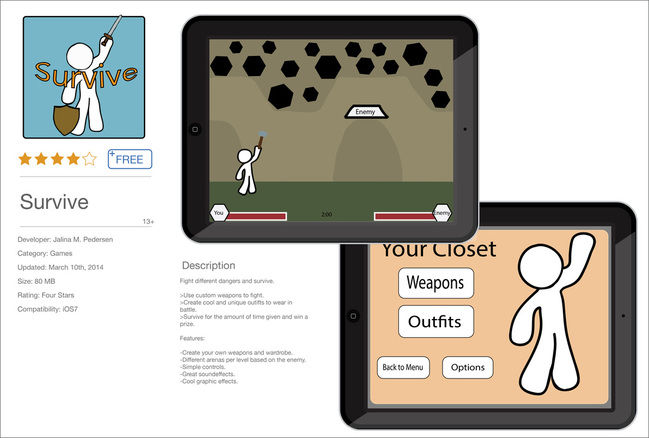
Background
We are living in a technology-driven world. We see it everywhere we look. Many colleges require students to purchase a laptop, virtually all businesses cannot survive without technology, and we ourselves feel the impact with iPads. As professional web designers, we need to keep ourselves up to date with the newest technology or risk falling behind. It is in your best interest to utilize the success of apps for phones and tablets.

Assignment
This project requires you to invent and design your own app. This app should be new and exciting. People should want to download your app. You should know the iPad's capabilities in order to understand what it can do. This is where your iPad research comes in. You will have TWO screenshots of your iPad. Screenshot 1 is what the app looks like when you open it. Screenshot 2 should display key features of the app’s capabilities; a visual representation of your application’s capabilities.

Read this article about creating an iPad app.

Steps:
  1. First fill out the iPad app worksheet and write a description of your app. It should be 1 page or less (but no shorter than 2 paragraphs—10 sentences). This will be included in your iPad app presentation. When you are finished, print it to the laserjet printer. I will edit the description and you must make changes and resend if necessary. 
  2. Create your logo in Adobe Illustrator. 
  3. Download the screenshot template.
  4. Create your HOME SCREEN for the app. This is what the app will look like when you open it.
  5. Create a screenshot of your app in action. Choose something that really showcases your app's abilities.
  6. Download the iPad App Presentation template. Put your logo and your two screenshots in the template. Place your iPad app description in there too. Make sure you fill out the info (price, category, etc).
  7. Submit into Classroom.
Vocab
  • Usability
  • UI (User Interface)
  • Vector
  • Template
​
Grading Criteria
Work habits (10%)
Proposal (20%)
Technical Quality (10%)
  • Use of technology (Macs/iWeb/Photoshop)
  • Craftsmanship
Design (35%)
  • Logo design
  • Design of the app
  • Copywriting
  • Interactivity
  • Layout
  • Content—images/fonts/colors
Usability (15%)
Creativity (10%)
  • Unique idea/design
1 Comment

Publishing a Web Site

4/27/2016

0 Comments

 
0 Comments

HTML Project: Heroes & Villains

4/7/2016

0 Comments

 
Picture
Picture
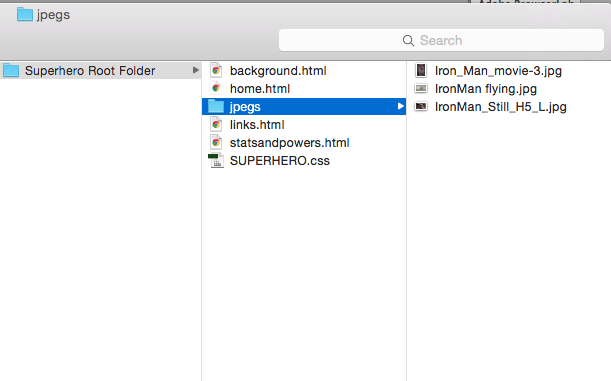
This is how your root folder should be organized


Assignment:
Your assignment is to create a fully functioning website with 4 different pages that link to one another using HTML code and utilizing the root folder, absolute paths, and relative paths. The theme of the site is: HEROES or VILLAINS. This assignment will be weighted as a project grade. 

HTML Directions:
  1. On your desktop, create your root folder and name it: Yourname Root Folder. This is your directory - a place that includes all files in the website.
    ***Remember, ALL files need to be in your root folder (directory) to work. See the screenshot above to view how this folder should be organized.
  2. Make another folder within your Root folder names "images".
  3. In Dreamweaver, File>New. Choose an html document with 2 column fixed left sidebar. Make sure HTML 5 is chosen and click "Create New File" under CSS.
  4. Name the style sheet: yourname stylesheet.css
  5. On the html page, change the name of the links on the left to: Home, Statistics, Background, Links
  6. In DW, click on SITE>MANAGE SITES. Then click NEW SITE. Then, name your site and define the local site folder as your ROOT FOLDER.
  7. Download 4 images from online (they don't have to be royalty free) and save them in the images folder inside of the root folder.
  8. Every page should have the following metadata in the <head>: title, keywords, author name, description, and viewport.

    ***Everytime you write the superhero/villain's name, italicize it (except when it is used in heads or subheads)
    ​
  9. Page 1: Index (<title> Home)
    This page should include the following:
    -An <h1> that says: [your superhero name]
    -<h2> that says: A website about [your superhero name]

    -Two <p> describing the superhero.
    -An ordered list that lists their enemies (use an h2 tag to title the list). 
    -Add an embedded image (linked to in the root folder) of the superhero (ie 
    images/iron man 4.png).
    -​Format the width of the image and give it alternate text.
    -Save as index.html.
  10. Page 2: Statistics (<title> Statistics)
    -Save a copy of your index file (click file>save as and save it as statistics.html). This makes a copy of your home page and names it statistics. Now change this page. 
    -An <h1> that says: Statistics.
    -A paragraph describing the superhero's abilities and how he/she uses them.
    -An h2 that says "Superpowers".
    -An unordered list describing this superhero's powers. 
    -Embed another image 
    (linked to in the root folder) of the superhero using his/her powers. Change the width and the alternate text.
  11. Page 3: Background (<title> Background)
    -Save as background.html. 
    -<h1> that says: Background of [Superhero's name].
    -3 short paragraphs describing the superhero's history, including his/her past.
    -Embed a YouTube video that is in some way relevant to your superhero or villain.
  12. Page 4: Links (<title>Links)
    -Save as links.html. 
    -
    An <h1>that says: Helpful Links.
    -A short paragraph telling the user that he/she can learn more by clicking the links below.
    -Add 3 links to 3 other web pages with more information and/or pictures of the superhero. Put the links in an unordered list. Title the list.
    -Embed an image. Change the width and the alternate text.
  13. Go back to your other 4 pages and link your global navigation in each one. The code is already there, you just need to put in the path (shown in blue).
    <a href="index.html">Home</a>
    <a href="statistics.html">Statistics</a>
    <a href="background.html">Background</a>
    <a href="links.html">Links</a>
  14. ​Make sure you check your links on all 4 pages to make sure they work, because that's what I'll be doing when I grade them.
  15. Use line breaks <br> where you think necessary and correct for your knowledge in formatting a web page.

CSS Directions
  1. ***See the screenshot below to understand which color is which css code.
  2. Make the 4 pages first and THEN do the CSS.
  3. Make sure your style sheet is in your root folder and linked to ALL 4 pages.
  4. Change the CSS only in the CSS file, NOT in your html pages. This way, you only have to do it once!
  5. You may NOT keep the color scheme used on the template. I got my color scheme from this site. Use a color scheme consistent with the hero or villain.
  6. Change the h1 color (you'll have to write this CSS code)
  7. Change the h2 color (you'll have to write this CSS code)
  8. Change the background colors (you'll edit the current CSS code)
  9. Change the link boxes (you'll edit the current CSS code)
  10. Change the link boxes colors when they hover (you'll edit the current CSS code)
  11. Change the font family for the body text, h1, & h2 (you'll edit the current CSS code)

Picture
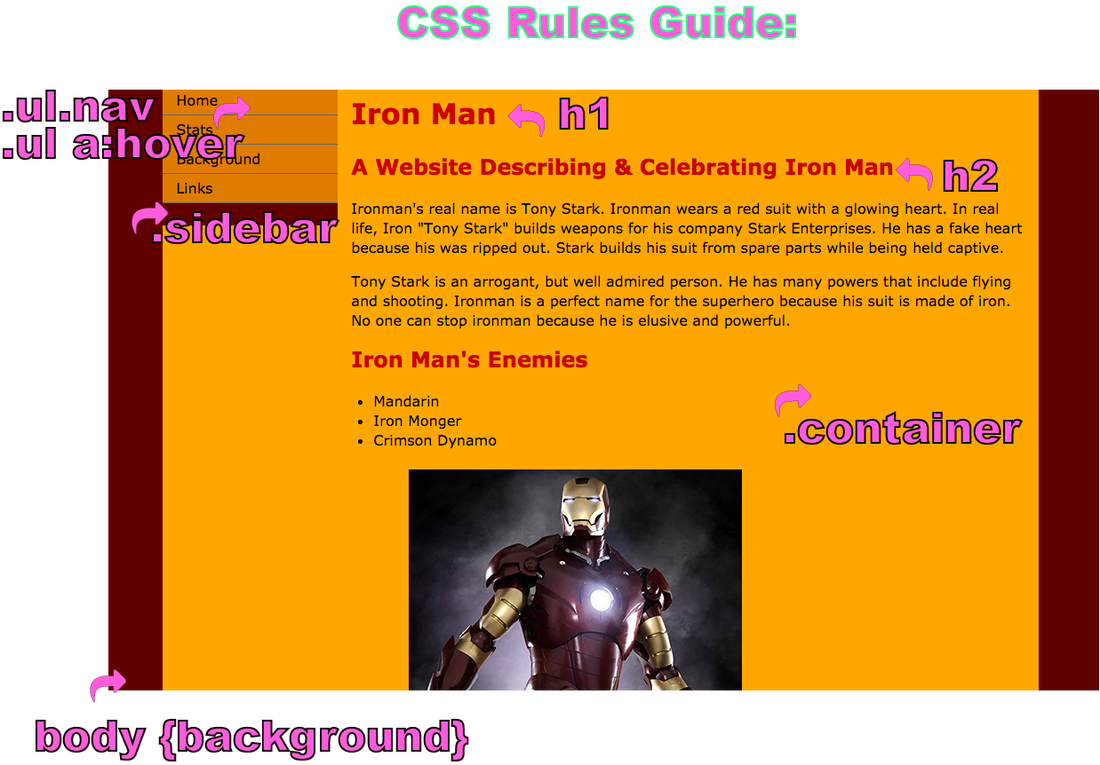
Javascript Directions
  1. On page 4 (the links page), insert this Javascript code
<p id="demo">Click below to learn the author of this site.</p>

<button type="button" onclick='document.getElementById("demo").innerHTML = "Yourname"'>Find out!</button>

EXTRA POINTS:

Picture
An example of a favicon: the small icon that shows up on your page tab
Extra points (+3) if you add a favicon:
  1. Search a favicon online. (or format one in PSD: must be 16px x 16px). The file must be named favicon.ico (you'll have to manually type in this file extension).
  2. Put it in your root folder. 
  3. In the <head> of each page, type this code, but link to the favicon (the text in blue below will be changed for your own favicon path within the root folder)
<link rel="icon" type="image/x-icon" href="favicon.ico"> ​
To learn more about relative and absolute paths ​
0 Comments

HTML: Practice 4 (with CSS)

4/5/2016

2 Comments

 
Picture
Picture
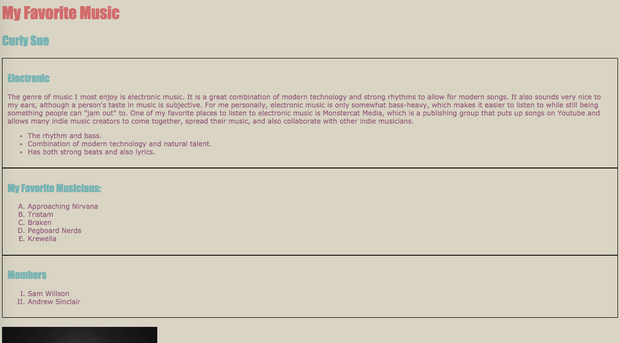
HTML Practice 4: My Favorite Music

Directions: Using Adobe Dreamweaver, create a website the contains info about your favorite genre of music and favorite artists/musicians/bands. 

HTML
  1. <title>Your name's Favorite Music
  2. <h1>My Favorite Music
  3. <h2>Your full name
  4. <div class="Bands"> Use div tags to break up the body into sections. The <div> tag goes in the body.
  5. Within the <div> tag, the Bands Section: must contain an h2 subhead (Bands), a sentence on your favorite bands, and an ordered list of your 5 favorite bands/musicians/performers. 
  6. <div class="Songs">
  7. Within the Songs Section: must contain an h2 subhead (Songs), a sentence on what type of songs you like, and an unordered list of your 5 favorite songs.
  8. Comment with 2 comments explaining the head and the body. 
  9. </br> line break when necessary
  10. Embed 1 image at the end using the <img src> tag. This image can be any image that you think would be appropriate to the page. 

CSS
  1. Background color: #D9D4C4
  2. Font family: Verdana
    CSS code for steps 1 & 2:

    body{
    font-family: Verdana;
    background-color: #D9D4C4;
    }


  3. h1 color: #D26C6C & h1 font family: Impact 
    CSS code for step 3:

    h1 {
    color: #D26C6C;

    font-family: Impact;
    }

  4. Use the same code in step 3, but change the h2 color: #78B4B4; h2 font family: Impact. 
  5. Use this CSS style for the 2 different <div> sections. The following code will be written twice, but you will replace "genre" for the names of the other 2 sections (Bands, Songs). These have to correspond to the sections you created: ie <div class="genre"> ***Capitalization is important.

    .genre { 
    color: #99617D; 
    font-family:verdana; 
    font-size: 10pt; 
    border: 1px solid black;

    padding: 10px;
    }

When done, open in Chrome to check and have a friend check over for you. Upload the html file to classroom. Save as yourname.practice4.html.
2 Comments
<<Previous
    DAILY AGENDA

    Google Classroom

    How do I print?!

    Links:

    Weebly


    DaFont

    Lost Type

    Free Images

    Unsplash.com


    74 Free Stock Sites from Canva

Powered by Create your own unique website with customizable templates.
  • Blog
  • Web Design
  • Dig Pub
  • Fashion
  • Photo
  • Graphic Design
  • Fashion 2
  • Student Gallery
  • About